Locate the Tip
To locate the probe tip, complete the following steps:

|
- Ensure that you are in the Setup view by clicking the Setup icon in the Workflow Toolbar.
|

|
- If you made use of the Alignment station to align the laser on the probe, click the Return from the Alignment Station button in the Focus Tip panel.
|
| |
- Zoom out as far as possible using the Zoom Out button, located beneath the video panel. This helps you locate the cantilever in the optical field of view.
|

| |
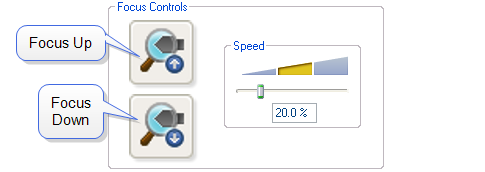
- Using either the trackball while holding down the bottom-left button or the Focus Up and Focus Down buttons move the optics up or down to focus on the cantilever.
|

|
- Click on the tip location in the video panel. This places crosshairs over the end of the cantilever where the probe tip is located, enabling the user to visualize the tip position even when the cantilever is out of focus (for example, when the sample surface is in focus and the cantilever is far above the sample).
|
This command locates the tip position (Z height) using optical focal distance measurements. When this step completes, the computer records the tip position in memory.
Previous Steps:
- Select Experiment
- Prepare and Load the Probe Holder
- Install the Probe Holder on the SPM Scanner
- Identify the Probe
- Align the Laser
- Adjust the Photodetector
Next Steps:
- Load the sample and Focus on the Sample Surface
- If your experiment involves TappingMode, you must now Tune the Cantilever before proceeding to the next step. If you are running a Contact Mode application, continue to Check Initial Scan Parameters.
- Engage, Scan, & Withdraw
 Related Topics
| www.bruker.com
|
Bruker Corporation |
| www.brukerafmprobes.com
|
112 Robin Hill Rd. |
| nanoscaleworld.bruker-axs.com/nanoscaleworld/
|
Santa Barbara, CA 93117 |
| |
|
| |
Customer Support: (800) 873-9750 |
| |
Copyright 2010, 2011. All Rights Reserved. |
Open topic with navigation